Learn how to install garage door weather stripping with this complete DIY guide. Step-by-step instructions to seal your garage door, improve energy efficiency, and protect against the elements.
Keeping your garage sealed and energy-efficient is one of the best upgrades a homeowner can make. Installing weather stripping helps stop drafts, prevent pests, and lower energy bills. If you’re wondering how to install garage door weather stripping, Meadows Garage Door offers a simple, affordable solution that enhances your home’s comfort.
For DIY enthusiasts or homeowners looking to save money, this guide will be your ultimate resource. We will explain the different types of weather stripping, essential tools for the job, and the common mistakes to avoid. By following this step-by-step guide, you’ll know exactly how to install garage door weather stripping like a professional.
What Is Garage Door Weather Stripping?
Garage door weather stripping is a sealing material applied around the edges of the garage door to block out air, moisture, dust, and pests. It also helps insulate your garage space.
Common Types of Weather Stripping
- Bottom Seal: Fits into a metal retainer on the bottom edge of the door. Includes T-style, bulb, or bead types.
- Side and Top Seals: Installed along the vertical sides and top frame of the garage. Usually made of rubber, vinyl, or PVC.
- Threshold Seal: This adheres directly to the garage floor and works with the bottom seal to create a tighter closure.
Tools and Materials Needed

Before you start installing garage door weather stripping, it’s important to gather all the necessary tools and materials. Having everything ready ahead of time will make the process smoother and more efficient. Here’s a comprehensive list of what you’ll need:
- Weatherstripping – Choose the correct size and type suited for your garage door (bottom seal, side seal, or top seal).
- Measuring tape – Essential for accurate measurements to ensure a snug fit.
- Hammer or power drill – Depending on your preference, either tool can secure the weatherstripping in place.
- Galvanized nails or screws – These prevent rust and provide long-lasting support.
- Utility knife or heavy-duty shears – For cutting weatherstripping to the appropriate length.
- Cleaning cloth and mild detergent – To clean surfaces before application for better adhesion.
- Adhesive – Needed for peel-and-stick weatherstripping types.
- Safety goggles and gloves – Protect your hands and eyes while working.
How to Install Bottom Weather Stripping
Step 1: Measure the Garage Door
Begin by measuring the width of your garage door to determine the correct length of weatherstripping. It’s crucial to do this when the temperature is mild, as extreme heat or cold can affect the flexibility of the materials. This ensures a better seal and proper fit.
Step 2: Remove the Old Seal
Using pliers or a flat-head screwdriver, carefully remove any old weatherstripping from the door. Once it’s removed, clean the bottom edge of the door with a mild detergent to remove dirt and debris. Allow the area to dry completely before installing the new seal for better adhesion.
Step 3: Cut the New Seal to Size
Unroll the new weatherstripping and compare it to the width of your door. Add one or two extra inches to the length to allow for a snug fit. Use heavy-duty shears to carefully cut the weatherstripping to the appropriate size, ensuring precise measurements for a proper seal.
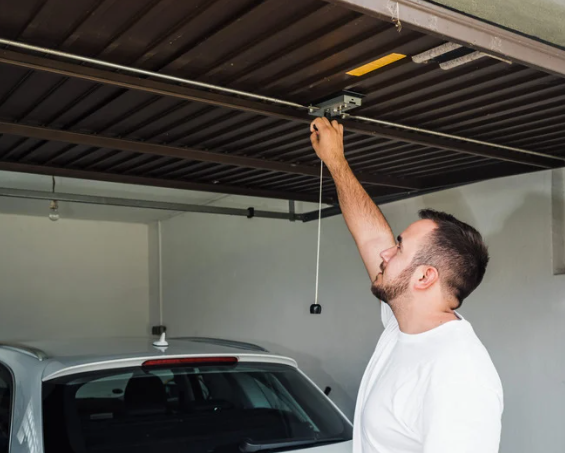
Step 4: Insert and Secure the New Seal
If your garage door has a metal retainer, slide the new weatherstripping into the track. For nail-on or screw-on types, fasten the seal securely, making sure it’s smooth and free of gaps or folds. Test the door by closing it to ensure the seal fits properly and the door operates smoothly.
How to Install Side and Top Weather Stripping
Step 1: Close the Garage Door
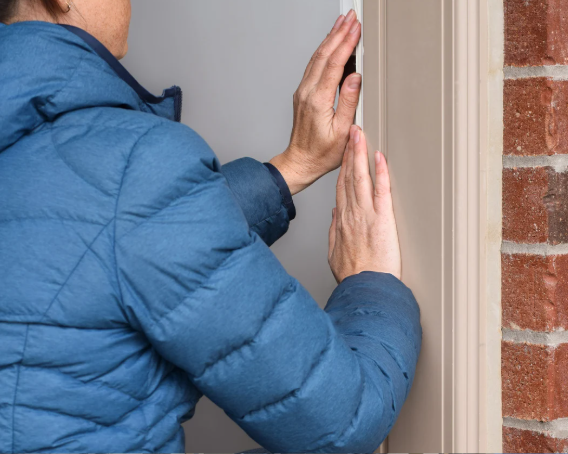
Begin by closing the garage door completely. This allows you to position the weather stripping properly, ensuring a tight seal. With the door closed you can avoid over-compressing the stripping while installing it, which could affect its effectiveness. A snug fit is key for maximum insulation.
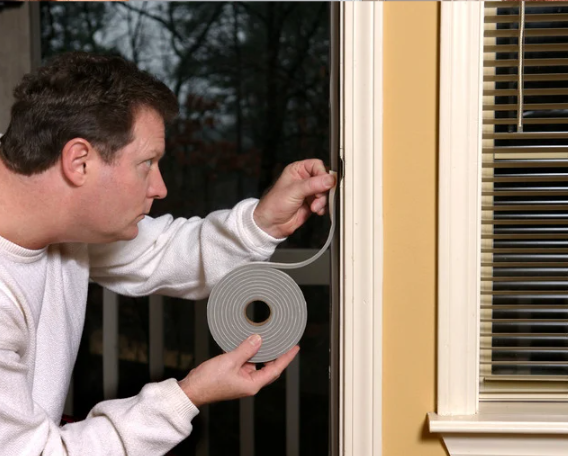
Step 2: Position the Stripping
Align the weather stripping along the vertical sides of the door. Ensure it gently presses against the closed door without being forced. Make sure the flap is even and continuous to provide a proper seal. This positioning will prevent drafts, dust, and moisture from entering the garage.
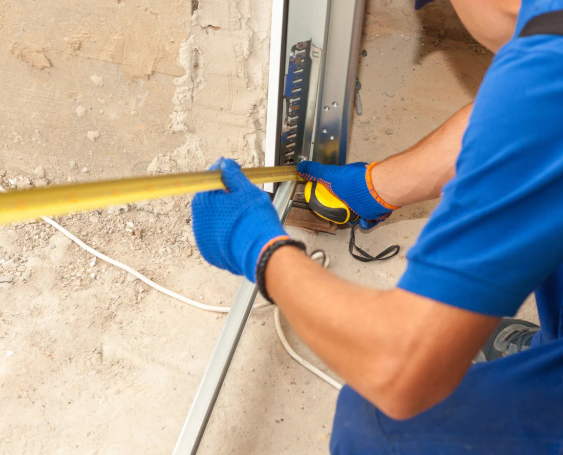
Step 3: Secure with Screws or Nails
Starting from the top, use galvanized nails or screws to secure the weather stripping in place. Space them about 6 to 8 inches apart to ensure a strong hold. Repeat the process along the other side and top of the door, securing each section tightly for an even seal.
Common Mistakes to Avoid
When installing garage door weather stripping, it’s important to avoid common mistakes that can compromise the effectiveness of the seal. Here are some pitfalls to watch out for:
- Using the wrong size or type of stripping: Ensure the weather stripping matches your garage door’s size and style for optimal sealing.
- Skipping surface cleaning before installation: Clean the door surface thoroughly before attaching the stripping. Dirt, dust, or grease can prevent the adhesive from sticking properly.
- Over-tightening screws: While securing the stripping, avoid tightening screws too much. Over-tightening can damage the seal or cause it to warp, affecting its functionality.
- Leaving visible gaps or misaligned seals: Pay attention to alignment while installing the stripping. Gaps will reduce energy efficiency and may let in moisture or pests.
- Installing during extreme temperatures: Avoid installation in freezing or overly hot conditions. Extreme temperatures can affect the flexibility and effectiveness of the weather stripping.
By taking care to avoid these mistakes, you can ensure that your garage door stays sealed, energy-efficient, and durable.
Weather Stripping Maintenance Tips
Proper maintenance of your garage door weather stripping can help extend its lifespan and ensure your home remains energy-efficient. Follow these simple tips to keep your weather stripping in top condition:
- Inspect Seasonally: Check the weather stripping before the start of winter and summer to ensure it’s intact and effective. Seasonal changes can cause materials to wear down, so regular inspections are essential.
- Look for Damage: Examine the weather stripping for cracks, stiffness, or visible air gaps. If you spot any signs of wear, it’s time to replace the damaged strips to prevent drafts or moisture from entering your garage.
- Lubricate: Apply a silicone-based lubricant to rubber weather stripping to prevent cracking or brittleness. This will help maintain flexibility, especially in extreme temperatures.
- Clean Regularly: Dirt, grime, and debris can reduce the effectiveness of weather stripping. Regular cleaning ensures optimal performance and prevents unnecessary wear.
These simple maintenance practices can keep your garage door sealed, saving energy and protecting your home from the elements.
Benefits of Proper Garage Door Sealing
Proper garage door sealing offers a range of benefits that go beyond just maintaining your garage’s appearance. Here are some key advantages:
- Energy Efficiency: Proper sealing helps maintain indoor temperature by preventing warm air from escaping in winter and keeping hot air out in summer, reducing heating and cooling costs.
- Pest Control: A sealed garage acts as a barrier to insects and rodents, preventing them from finding their way inside.
- Noise Reduction: Seals can help minimize external noise, such as traffic or neighbor sounds, creating a quieter and more peaceful garage environment.
- Improved Comfort: With a well-sealed door, your garage can serve as a more functional workspace or storage area, with consistent temperatures year-round.
- Increased Door Lifespan: Proper sealing helps prevent water infiltration, reducing the risk of rust, water damage, and rot, ultimately prolonging the life of your garage door.
Investing in garage door sealing is an affordable way to enhance your home’s overall comfort and longevity.
Frequently Asked Questions
What Kind of Weather Stripping is Best for a Garage Door?
Rubber and vinyl weather stripping are excellent choices for garage doors, as they provide high durability and weather resistance. T-style and bulb-type seals are particularly effective for bottom protection, preventing drafts, moisture, and debris from entering your garage.
How Long Does Garage Door Weather Stripping Last?
Garage door weather stripping typically lasts between 2 to 5 years, depending on factors like weather exposure and usage. Regular inspection is crucial to detect any signs of wear, such as cracking or brittleness, to ensure the stripping remains effective at sealing your garage.
Can I Install Garage Door Weather Stripping Myself?
Yes, installing garage door weather stripping is a DIY-friendly project. With basic tools like a screwdriver and a utility knife, most homeowners can complete the installation in under two hours, ensuring their garage remains well-insulated and protected from the elements.
Should the Garage Door Weather Stripping Touch the Ground?
Yes, the weather stripping should lightly touch the ground to create a seal. However, it should not exert excessive pressure, which could hinder the smooth operation of the garage door. A proper seal ensures air blockage without impeding door movement.
Does Weather Stripping Really Save Energy?
Yes, weather stripping significantly saves energy. By preventing drafts and heat loss, especially in attached garages, it helps maintain your home’s temperature. This reduces the strain on heating and cooling systems, ultimately lowering energy bills and making your home more energy-efficient.
Conclusion:
Installing garage door weather stripping is a smart, cost-effective way to improve energy efficiency and comfort, home. By sealing gaps, you reduce drafts, keep pests out, and prevent moisture damage. With the right tools and guidance, homeowners can confidently complete this project and protect their garages from seasonal weather changes.
Whether you’re a DIY enthusiast or a first-timer, learning how to install garage door weather stripping gives you better control over indoor temperatures and noise. A properly sealed garage can help lower utility bills and increase your home’s value. Trust in these simple steps to make your garage more durable, efficient, and weather-ready.
End Note
Meadows Garage Doors is your go-to partner for weatherproofing and all things garage door-related. Whether you need help with garage door weather stripping or want to explore our full range of garage doors, we’ve got you covered. Learn more about us and meet the experienced team that proudly serves your neighborhood through our service areas.
Discover how Meadows Garage Doors combines expert craftsmanship with reliable service. Visit our official website to schedule your next service, or follow us on Facebook for updates, tips, and special offers. From small fixes to total transformations, we’re here to help keep your garage secure, energy-efficient, and ready for every season.