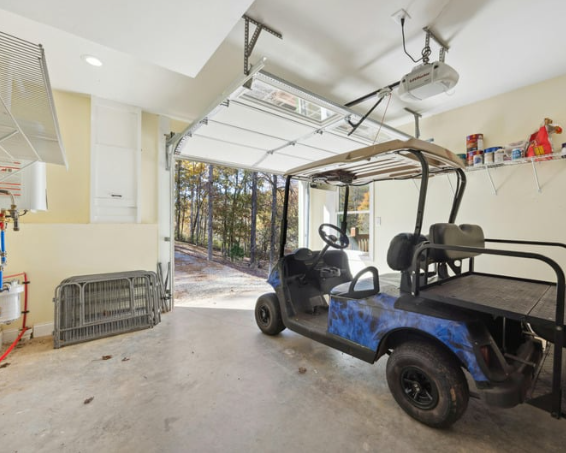
Learn how to replace your garage door opener battery with this comprehensive 2025 homeowner’s guide. Discover step-by-step instructions, troubleshooting tips, and the benefits of timely battery replacement for efficient garage door operation.
If your garage door remote malfunctions or your opener system experiences issues after a power outage, the culprit is likely a dead garage door opener battery. Knowing how to replace the garage door opener battery is crucial. This simple task ensures your garage door operates smoothly without unnecessary disruptions or delays.
For homeowners in need of reliable garage door services, Meadows Garage Door is a trusted name. Whether you’re wondering how to replace a garage door opener battery or need assistance with other repairs, their team provides expert service. Meadows Garage Door is dedicated to ensuring your garage door operates efficiently and safely, offering peace of mind.
Why Replacing the Garage Door Opener Battery Matters

A weak or dead battery in your garage door opener can lead to several issues that compromise the functionality and safety of your system. It’s essential to replace the battery regularly to maintain a reliable and secure garage door operation. Here’s why replacing the battery matters:
- Remote controls stop working: A dead battery can prevent your remote from sending signals to the opener, making it impossible to open or close your garage door from a distance.
- Backup systems fail during power outages: If your opener has a battery backup system, it may not function when needed in case of a power outage, leaving you stranded outside or inside your garage.
- Inconsistent door operation: Low battery power can cause erratic behavior, with the door opening and closing inconsistently.
- Safety features malfunction: Critical safety features like auto-reverse may not work properly if the battery is weak, potentially creating a hazard.
Replacing the battery ensures your system stays functional, responsive, and safe.
Know Your Garage Door Opener Type
Before replacing the battery, it’s essential to determine whether you need to replace the remote control battery or the backup battery within the garage door opener. Different brands use different battery types, so identifying the right one is key.
Common remote brands & batteries:
- LiftMaster: CR2032 or 3V lithium coin cell
- Chamberlain: CR2025, CR2032
- Genie: AAA or A23 12V battery
Backup batteries (within the opener):
- Typically, 12V 4.5Ah sealed lead-acid battery
Each garage door opener brand has specific battery requirements for both the remote control and the backup power system. Be sure to check your owner’s manual or look at the battery compartment to confirm the correct type before purchasing a replacement. Replacing the right battery will ensure your opener continues to operate smoothly, even during a power outage.
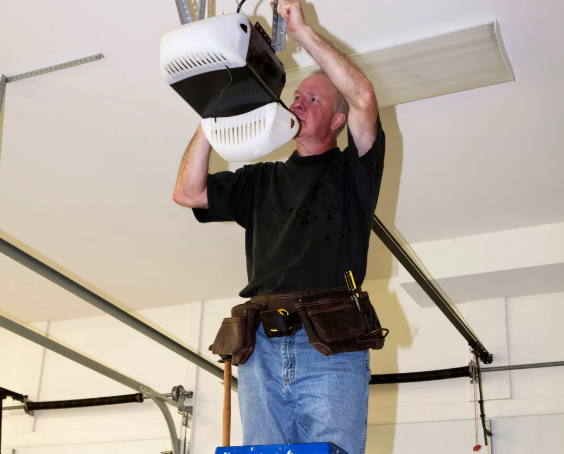
Tools & Supplies You’ll Need Before Starting
Before beginning the process of replacing your garage door opener battery, it’s essential to gather the right tools and supplies to ensure a smooth and safe installation. Here’s a list of what you’ll need:
- New replacement battery (remote or backup): Make sure you have the correct battery type for your garage door opener remote or backup system. Check your owner’s manual for the right specifications.
- Flathead screwdriver or coin: You’ll need a flathead screwdriver or a coin to open the compartment holding the battery in the remote or backup system.
- Step ladder: A step ladder will help you reach the garage door opener and the ceiling-mounted unit comfortably. Ensure it’s stable and at a safe height.
- Safety gloves (optional): While not required, safety gloves can help protect your hands from dirt, dust, and sharp edges when handling components of the opener system.
Having these tools and supplies ready will make the replacement process quick and efficient.
How to Replace the Remote Control Battery (Step-by-Step)
1. Open the Battery Compartment
Start by sliding or popping open the back cover of your remote. If the compartment is stubborn, use a flathead screwdriver or a coin to gently pry it open. Take care not to damage the casing during this step, as it’s important for reassembling the remote later.
2. Remove the Old Battery
Carefully remove the old battery from the compartment. Take note of the battery’s orientation, as this will guide the placement of the new battery. If needed, use gloves to handle the battery to avoid transferring moisture or oils from your hands, which could affect the new battery’s performance.
3. Insert the New Battery
Place the new battery into the compartment, ensuring it matches the correct polarity. Align the positive (+) and negative (-) ends as indicated in the compartment. Gently press the battery into place, making sure it fits snugly without forcing it, which could damage the remote’s internal components.
4. Snap the Cover Back On
Once the new battery is in place, carefully snap the back cover back on. Ensure it’s secure and properly aligned. If the cover doesn’t snap easily, double-check the orientation to avoid damaging the remote. Properly sealing the compartment will ensure the remote remains protected from dust and debris.
5. Test the Remote

Stand near your garage door opener and press the button on your remote to test if it functions properly. If the door opens or closes smoothly, the battery replacement is successful. If not, check the battery orientation or consider trying a new battery to rule out any issues.
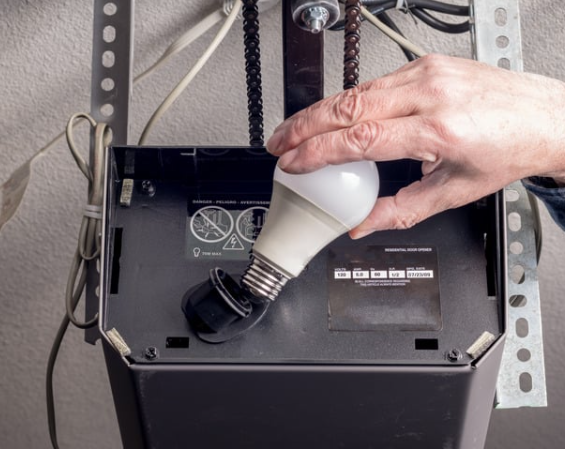
How to Replace the Backup Battery Inside the Opener Unit
Replacing the backup battery inside your garage door opener ensures that it continues to function properly during power outages. Follow these steps for a smooth replacement:
- Unplug the opener: Disconnect the opener from the power outlet for safety.
- Locate the battery compartment: Find the battery compartment, typically located behind a panel on the opener unit.
- Open the compartment: Use a screwdriver to remove the panel if necessary.
- Remove the old battery: Carefully disconnect and remove the old battery from the compartment.
- Install the new battery: Insert the new battery, ensuring the red (positive) terminal is connected to the positive side and the black (negative) terminal to the negative side.
- Close the panel: Secure the compartment panel back in place.
- Plug the opener back in: Reconnect the opener to the power outlet.
- Test the system: Unplug the opener again to confirm it runs on battery power, ensuring everything works correctly.
Following these steps will keep your garage door opener running smoothly even when the power goes out.
Common Mistakes to Avoid During Battery Replacement
When replacing the battery in your garage door opener, there are a few key mistakes to avoid to ensure a smooth process:
- Using the wrong battery type or size: Always check the owner’s manual to confirm the correct battery type and size. Using the wrong battery could lead to malfunction or shorter battery life.
- Not matching terminal polarity: The positive and negative terminals must align correctly. Incorrect polarity can damage the opener’s electrical components.
- Failing to reprogram the remote (in rare cases): Some garage door openers require reprogramming after a battery replacement. Be sure to follow the manual’s instructions to avoid connection issues.
- Forgetting to dispose of the battery safely: Old batteries contain harmful chemicals and should be disposed of properly. Many local areas offer battery recycling programs to keep your environment safe.
Garage Door Opener Maintenance Tips After Battery Replacement
Once your battery replacement is complete, follow these maintenance tips to keep your garage door opener in top condition:
- Test the opener monthly: Regular testing ensures the opener is functioning properly after the battery change.
- Recheck sensor alignment: Misaligned sensors can prevent the door from closing correctly. Make sure they are aligned and unobstructed.
- Keep remotes stored safely: Store remotes in a dry, cool location to prevent unnecessary battery drain.
- Schedule yearly inspections: Annual professional inspections can catch potential issues before they become major problems.
Frequently Asked Questions (FAQ)
How Often Should I Replace My Garage Door Opener Battery?
It’s recommended to replace your garage door opener battery every 1-2 years for remotes and every 2-3 years for backup opener batteries. Regular battery replacements help ensure optimal performance and prevent unexpected failures, ensuring your garage door operates smoothly and reliably when needed.
What Type of Battery Goes in a Garage Door Remote?
The type of battery depends on your garage door opener brand. Common batteries include CR2032, CR2025, or 12V A23. Check your remote’s manual or the battery compartment for specifications. Using the correct battery ensures proper functionality and prevents unnecessary malfunctions in your remote system.
Can a Dead Battery Stop My Garage Door From Opening?
Yes, a dead battery can prevent your garage door from opening. If both the remote and wall unit fail, the issue is likely a dead battery or power failure. Replacing the battery should restore functionality. If the problem persists, check for other electrical issues or call for a professional.
Do Smart Garage Openers Use Special Batteries?
Most smart garage openers use standard batteries like CR2032 for remotes. However, some models may require specialized batteries or a power source for the opener itself. Always refer to your manual or model specifications for the correct battery type to avoid compatibility issues and ensure smooth operation.
How Can I Extend the Life of My Garage Door Opener Battery?
To extend the life of your garage door opener battery, regularly check for any signs of low power, such as delayed responses. Keep the opener’s battery contacts clean and avoid extreme temperatures that can degrade battery life. Additionally, using high-quality batteries can help extend overall performance.
Conclusion:
Replacing your garage door opener battery is a simple yet essential part of garage door maintenance. It helps prevent remote failures, improves safety, and ensures daily convenience. With proper guidance, most homeowners can confidently complete this DIY task. However, professional support is always an option for extra peace of mind and reliability.
Consistent maintenance, including timely battery replacement, keeps your garage door system efficient and long-lasting. As trusted experts in garage door solutions, we recommend checking your opener battery regularly. Whether you’re tackling it yourself or hiring a pro, caring for your garage door protects your home’s security and functionality for years to come.
End Note
Meadows Garage Doors is your go-to team for expert garage door opener services—from fast battery replacements to complete system installations. Our skilled technicians bring reliability, safety, and smooth performance to every job. Learn more about our services, explore our full range of garage doors, and meet the dedicated team behind every repair and installation.
We proudly serve homes across multiple areas—check if we cover yours by visiting our service areas. Ready to book? Visit our official website or connect with us directly on Facebook for updates, tips, and support. Trust Meadows Garage Doors—where fast, friendly service is just one click away.